Step by step lasagnas cupcakes

Better late then never! A super simplified tutorial on the "cupcake" mini lasagnas Oliver made for the baby showerSince almost all of the guests came straight from work we wanted to serve something that might be considered dinner but didn't require utensils and a place to sit. Mini "cupcake" lasangas were a perfect, delicious, real food solution. Give them a try at your next party!
What you'll need: wonton wrappers, a cupcake baking pan and the ingredients for your favorite lasagna recipe (we made one spinach and one pork).


Start by laying out the room temperature wonton wrappers as shown in the top left photo. Press the wrappers into your cupcake pan and fill with your prefered lasagna mixture.  
(We filled our meat lasagnas with a stewed tomato and ground pork mixture and then topped it with shreds of fresh mozzarella, a bit of ricotta and shaved Parmesan.) Onto that layer a third wonton wrapper and a repeat of your lasagna mixture. Then into the oven for 20 minutes at 375 degrees. Oliver embellished the lasganas with a basil leaf and sliced grape tomato before serving them to our guests.


Eva's baby shower: food, games & favors


A couple of weeks ago Oliver and I co-hosted a girls only baby shower for a friend. While I organized invitations, decorations, games and favors - Oliver took responsibility for food and drinks.  The food was so incredible that two different guests asked if my husband was caterer. Later this month we'll share the "cupcake" lasagna recipe.
Oliver's Baby Shower Menu
Two types of finger sandwiches: 
• Apple slices with prosciutto and a drizzle of honey
• Cucumber slices with goat cheese and fresh dill
Two types of "cupcake" lasagnas:
• Meat • Spinach
Three varieties of crostini:
• Bruschetta  • Baba ganoush  • Goat cheese with fig jam and a pickled grape tomato


The Mom-to-be's last name is "Story" - so the theme of our shower was "Storybooks". I had a lot of fun coming up with ways to incorporate storybooks into the party. The first thing I did was to ask Eva's guests and out-of-town friends and family to help surprise the first time parents with a collection of books. Every invitation included a bookplate that read "The sweetest story" along with a note explaining the surprise group gift. Books arrived from as far as Korea and Austria (with guests coming from Los Angeles and New York City). 


The obligatory shower game was also used to highlight the theme: Pictionary - Nursery Rhyme edition! This game was super easy to prepare and a surprising amount of fun. Before the shower I wrote the name of 25 nursery rhymes onto 25 blank cards. Then I dragged my old easel, a pad of newsprint and some Sharpies from the art closet. BOOM! We were ready to play. Instead of teams we pitted the Mom-to-be against the young daughter of a friend and had the guests guess what they were each drawing.


For my bridal shower Oliver's aunt made a dozen ceramic, heart shaped, jewelry dishes. I was so flattered by her thoughtful handmade gift that I knew I wanted to pay-it-forward and do the same for Eva. My first thought (as vegetable garden crazed person) was to grow a dozen bean sprouts, replant them in cute terracotta pots and tie on a tag with a quote from Jack and the bean stock. But there was neither enough time or money for that idea so I improvised. Instead, I bought two flats of marigolds, replanted them into styrofoam cups, wrapped the cups in pink scrap booking paper and included a personalized tag that read:
A marigold for your garden-
Mary, Mary quite contrary
how does your garden grow?
With silver bells and cockleshells
and pretty friends all in a row.

I'd never hosted any type of shower before this one. I was nervous about how it'd go. Eva's wonderful friends and Oliver's impressive cooking made for a fun and easy going evening. My thanks to them! 


Little garden, big bugs: how we organically fight hornworms and cabbage worms

This is the fourth summer Oliver and I have kept a vegetable garden. Each season has brought it's own challenges and lessons. We're nowhere near "master gardeners" but I do think our experiences may help beginner gardeners who are facing the frustration of pests or under producing vegetable plants. Later this month I'll cover how we encourage growth; today I want to address something more fun - GIANT BUGS!


Our first (and only) hornworm attack was during the summer of 2010. I've seen them described as "alarmingly large" - which is true but doesn't do justice to how terrifying it is when first encountering them. Their fat bulby heads remind me of the Predator alien. I was in such dazed disbelief the first time I encountered them that I grabbed my camera and made the following videos (which are also kinda funny). 


This spring we had our first encounter with the equally destructive cabbage worms. The information I found online gave the same advice for controlling both horn and cabbage worms: hand pick the buggers off the plants and kill them. As I mentioned in a post in March I doggedly protected my cabbages for months. Once a day I'd kneel in front of my 6 plants, turning over every single leaf, squishing the little worms and throwing the bigger ones onto the pavement walkway. This worked until I became outnumbered. As the cabbage leaves got bigger the butterflies were getting trapped in the interior leaves and laying dozens of eggs - leading to dozens of worms. I couldn't keep up. That's when Oliver found an organic worm and caterpillar killer with BT (shown in the photo top of post). I give it two thumbs up. Here is how we use it:


Fill a spray bottle (size shown in picture) with water, add a teaspoon of the BT worm killer solution, shake well and then spray all cabbages, tomatoes, eggplants and peppers. Be sure to coat the tops and undersides of all leaves as well as growing fruit. Repeat once a week, after heavy rain or watering.  The solution won't keep the worms away but it will kill them once they eat it.  As your garden grows keep an eye out for tiny caterpillars; if you do get an infestation it's best to catch it early.


Happy Birthday YDFM!


Happy 35th Birthday to Your DeKalb Farmer's Market! (YDFM to us)


We're going to change things up for the month of June. In place of photos of meals we're going to share specifics on our favorite ways to cook certain foods. In addition to the garden photos we'll go a little more in depth about our (amateur) tactics for keeping everything alive. Check back for mini lasganas, grilled okra, toasted kale, fish emulsion and how to win the battle with cabbage worms!

Shredded Chicken Mole

Here it is, my end of year admission of truth: I don't cook. Ever. Every photo of food you've seen on this blog is food made by Oliver. Some of you already know this. Others have been told but don't seem to fully believe it. 


I've mentioned in past blog posts that until I met Oliver I was surviving on frozen Lean Cuisines and Honey Bunches of Oats cereal. (Fortunately every boyfriend I've had as an adult has liked to cook so thanks to them there were plenty of real food meals sprinkled in throughout my 20s.) As a kid my family sat down to enjoy dinner together five nights a week but somehow the cooking bug just never bit me. I don't even like to bake. I share this information to emphasize what a big a deal my new year's resolution is (to me). So here it goes: In 2012 I will learn to cook! I will no longer fear the kitchen, it's fire or it's knives!


Tonight Oliver tricked me into starting my resolution two nights early. While at YDFM today we picked up four large, bone in, chicken breasts to use in a chicken mole. Once home he left to help a friend with some home improvement work. On his way out I was handed handwritten instruction sheet of how to cook the chicken. YIKES! I was truly truly nervous. What if I ruined our new stainless steel pans? What if the chicken was undercooked or overcooked and rubbery? What if I caught a dish towel on fire? Thankfully, Oliver made his instructions super easy (bordering on idiot proof) and I succeeded in cooking dinner for myself! Hello dawn of a new era. What follows is a transcription of his chicken scratch recipe:
1. Heat saucier over med/high heat for 5 minutes - until drops of water from your hand roll and bead on the pan. 
2. Add enough olive oil to cover the bottom of the pan.
3. Add 2 chicken breasts and leave untouched until browned and released from he pan. Then flip, repeat and remove to plate. Do the same for the next 2 breasts.
4. In the pan, with the remaining brown bits, add a small amount of chicken broth. Scrape with wooden spoon. 
5. Add mole sauce from jar and a bit more broth.
6. Whisk until mostly combined.
7. Add more broth and whisk.
8. Add back chicken, cover and cook for 5 to 10 minutes.
9. Remove chicken and shred with fork.
10. If shredded meat is pink then add back to saucier and cook a little longer (mine was). 


I wrapped my chicken mole in a flour tortilla and drizzled it with a small amount of sour cream. If Oliver was here we'd have a side dish or green or bean or something. But that felt too ambitious for my first meal. Perhaps tomorrow I'll make a cabbage and jalapeno slaw...


Oliver, Topher and myself hope you will continue to check in with us as we bring our heart healthy lifestyle into the new year. We have big plans for 2012 and we look forward to sharing them all with you. I'm curious, what heart healthy plans do you guys have for the new year?


CHEERS! And happy new year too! - Cullen

Oliver's pressure cooker stock

When we registered for a pressure cooker as a wedding gift we primarily intended to use it for canning.  As it turns out, we use it much more for stock making than canning.  In fact, we've made so much stock in it that the gasket and pressure plug have taken on the smell of glutamate (the amino acid that makes things taste savory - think of the smell of raman).  It smelled so good that it was eaten by a squirrel that found it's way into our attic; we had to reorder the part online.


Stocks made in a pressure cooker take a fraction of the time; 45 minutes under pressure compared to hours of slow simmer.  They also end up with a richer color and flavor that, while not appropriate for all applications, compliment many of the things I use it for.  They do end up a bit more cloudy than simmered stocks but who cares when it is going in a gumbo?  If I need a light flavored, low bodied stock I grab a box out of the cupboard.

Some people poach a whole bird but that always seemed to be a bit of a waste. These two guys (to the left) were destined for a tailgate gumbo. Legs, thighs, breast meat, wing drums and flats went back into the fridge; everything else (minus the liver) went in a 450 degree oven until nice and brown. I supplemented it with a few pounds of scrap backs, rib cages and necks from the market. There's enough meat on the scraps to give the final stock a nice "chickeny" flavor and the browning gives it a color and depth.

The only particularly fresh vegetables were the onions and the parsley.  Everything else was on it's way out.  The carrots and celery were both soft and the leak tops would have gone in the trash otherwise.  Everything looses it's structural integrity in the cooker. Carrots that were simply soft going in now fall apart when you try to pick them up; bones are crushed between your fingers with the lightest pinch. The leak tops and parsley make a fairly effective strainer when they go in last.


After straining, chilling and skimming the solid fat off the top I was left with a little over a gallon and a half of stock from this batch.  Most of it ended up in the gumbo, a few cups in the squash soup and the rest headed to the freezer for some future fun.  Total time, about two and a half hours including bringing the cooker up to pressure and chilling it down. -Oliver


Roast chicken

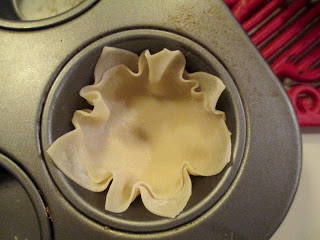
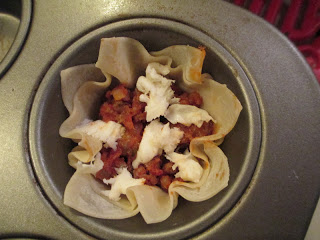
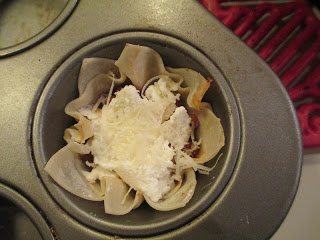
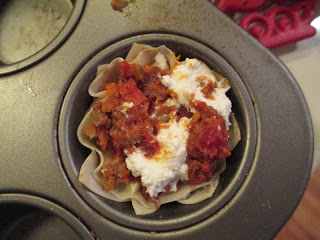
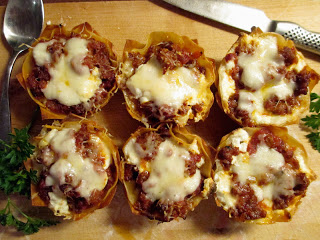
Roast chicken is a fantastic choice for making multiple affordable meals that don't taste redundant. The same roast chicken can be Mexican style tacos one night and Italian inspired pasta the next.

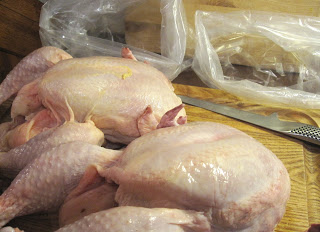
This chicken came from YDFM. For dinner it was paired with curried cauliflower and half of a baked sweet potato. For lunch it was pulled apart and mixed with raisins, dried cherries, nuts and parsley (aka: chicken salad).


Overall it made four individual dinners and two individual lunches.  Not bad for something that only required one night of cooking. (Oliver kept the bones and carcus to use in a stock for gumbo later this fall.)